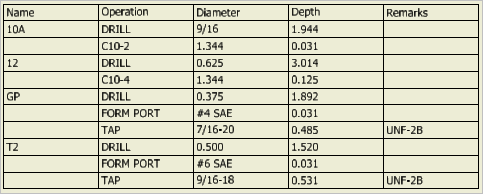
Once the design of a manifold is complete and checked, the machining chart of the design can be automatically extracted from the manifold and inserted into the 2D machining drawing.
Automatically extract the machining data from all the cavities and create the machining chart. Machining Chart is created as Inventor table object for easily modification.
1. MDTools 785 ribbon > Create panel > Machining Chart
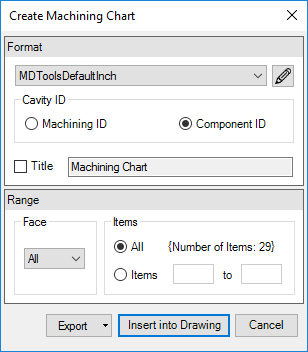
The Loading Cavities List message box displays and is followed by the Create Machining Chart dialog box.

2. Select the required options.
3. Click Insert into Drawing.
The Select Top Left Corner (Point1) message displays.
4. Click OK.
5. Select the top-left corner to define a rectangular window for the machining chart.
The Select Bottom Right Corner (Point2) message displays.
6. Click OK.
7. Select the bottom-right corner to define a rectangular window for the machining chart.
MDTools® creates the machining chart in the selected window according to the selected machining chart format.
If the selected window is insufficient to create the
complete machining chart,
the Select Top Left Corner (Point1) message reappears.
8. Repeat the above steps until the complete machining chart is created in the drawing.

Note
The active text style in Inventor is used to create the machining chart.
Use the word ‘AND’ instead of ‘&’ in the
cavity machining information.
Using ‘&’ will result in bad data in the machining chart.
(Limitation in Inventor API)
For Sun Cavities, the steps above the block surface are ignored in the Machining Operation information.