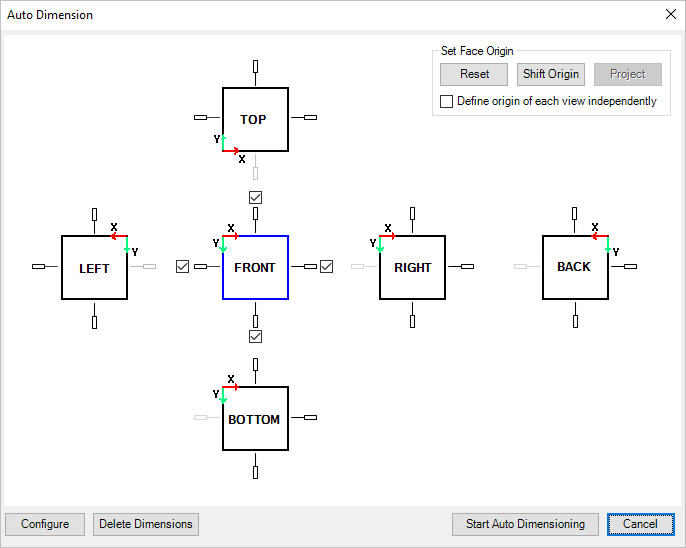
Automatically dimension all the cavities on all the six views of the manifold in the 2D drawing.
1. MDTools 785 ribbon > Dimension panel > Auto dimension
Auto Dimension dialog box displays.

Sides available for dimensioning are displayed in black.
Sides unavailable for dimensioning are displayed in gray.
The views in the dialog box display exactly with the same placement and
orientation as in the drawing space.
2. Select a view to set face origin and sides available for dimensioning (i.e. Front view is selected in image).
The default option is Both sides.
3. Click Reset to restore the face origins to their default positions.
4. Click Shift Origin to set the origin position as per the requirement.
5. Click Project to project current face origin to other face and update origin of other faces.
6. Select Define origin of each view independently to define each view origin independently.
If unselected, the Shift option will shift current face origin and project other face origin according to the current face origin.
The default option is Both sides.
7. Click Configure.
The Configure Auto Dimension dialog box displays.
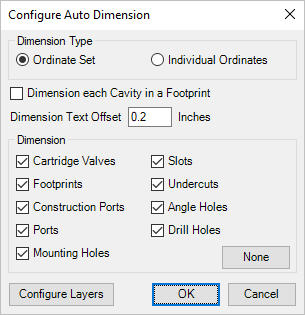
8. Select required Dimension Type.
Individual Ordinates creates individual ordinates instead of ordinate sets for each dimension created in 2D drawing.
9. Select Dimension Each Cavity in a Footprint to dimension all the cavities in footprints. Otherwise, only the cavity marked ‘dimension from this cavity’ is dimensioned.
10. Enter Dimension Text Offset, i.e., the distance between the dimension text and the block.
11. Select items to be dimensioned under Dimension section for dimensioning cavities of the manifold in modelspace.
12. Click Configure Layers to specify dimensioning layers for different cavity types.
The Drawing Layers dialog box displays.
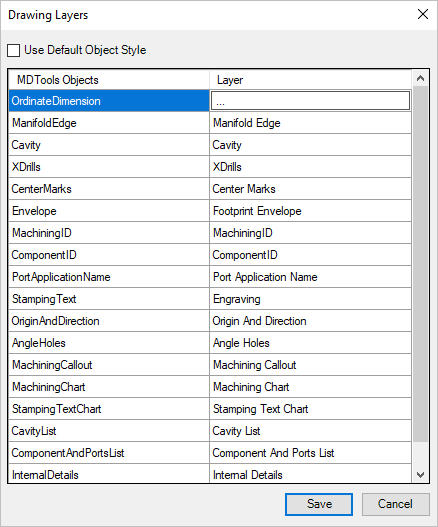
Three dots (…) are displayed instead of layer name for ordinate dimension.
13. Click on the Layer cell corresponding to OrdinateDimension.
The Ordinate Dimension Layer dialog box displays.
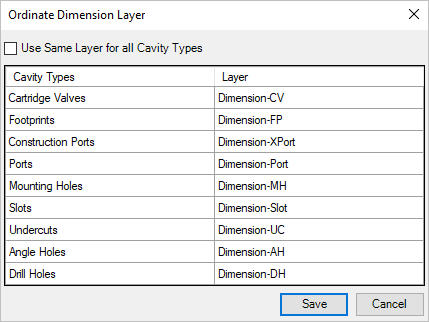
14. Select Use Same Layer for all Cavity Types to specify same layer for all cavity types of manifold in modelspace.
You can also specify different layers to different cavity types of manifold in modelspace.
15. Click Save in the Ordinate Dimension Layer dialog box to save the customized settings.
16. Click Save in the Drawing Layers dialog box.
17. Click OK to save the customized settings.
18. Click Start Auto Dimensioning after selecting all the required options to dimension the manifold.
All dimensions are created in ordinate dimensions, per the properties set in the current dimension style.
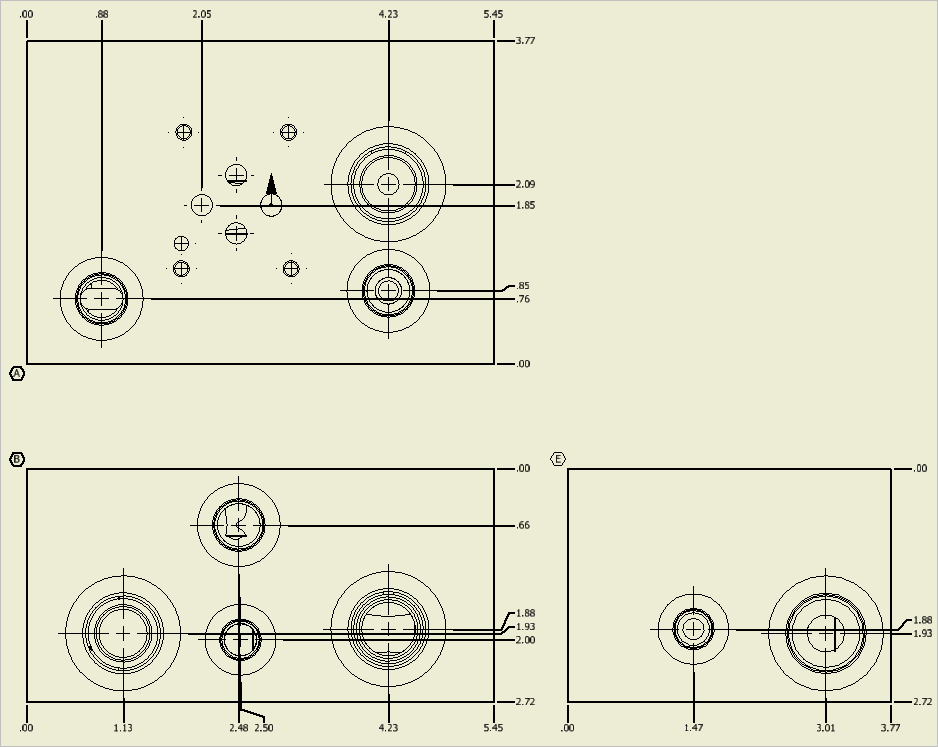
Cavities dimensioned automatically: Ordinate Set
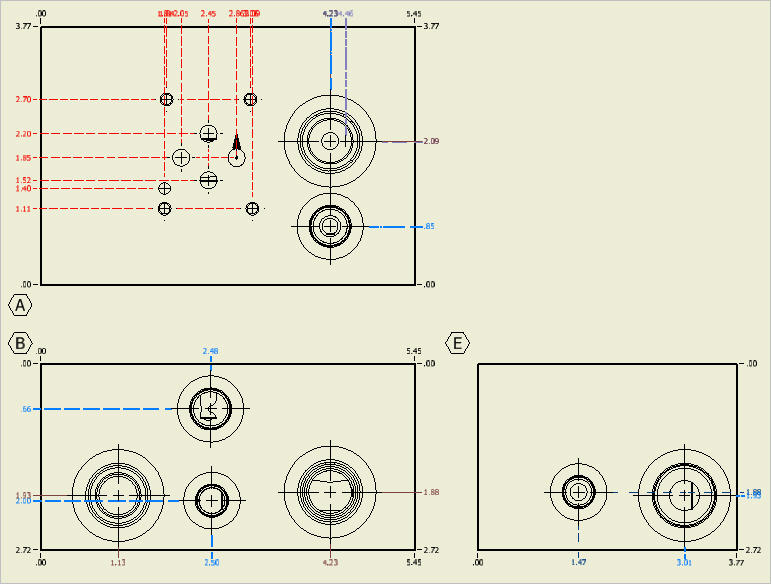
Cavities dimensioned automatically: Individual Ordinates