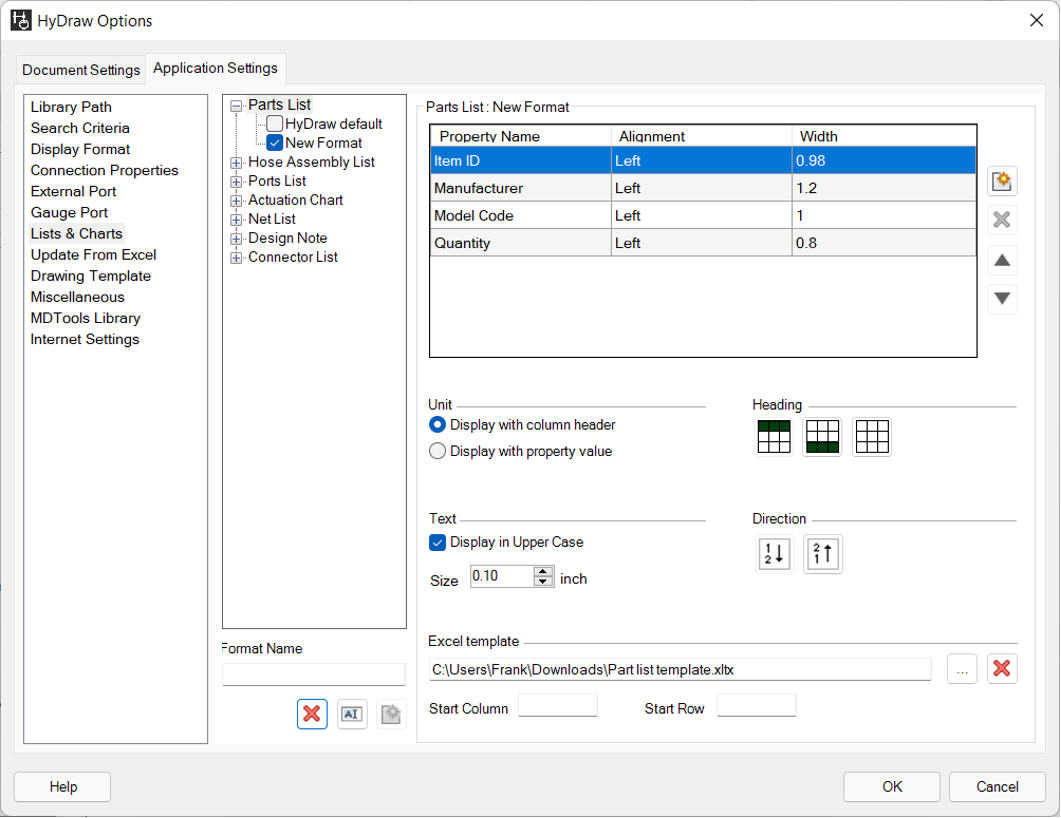
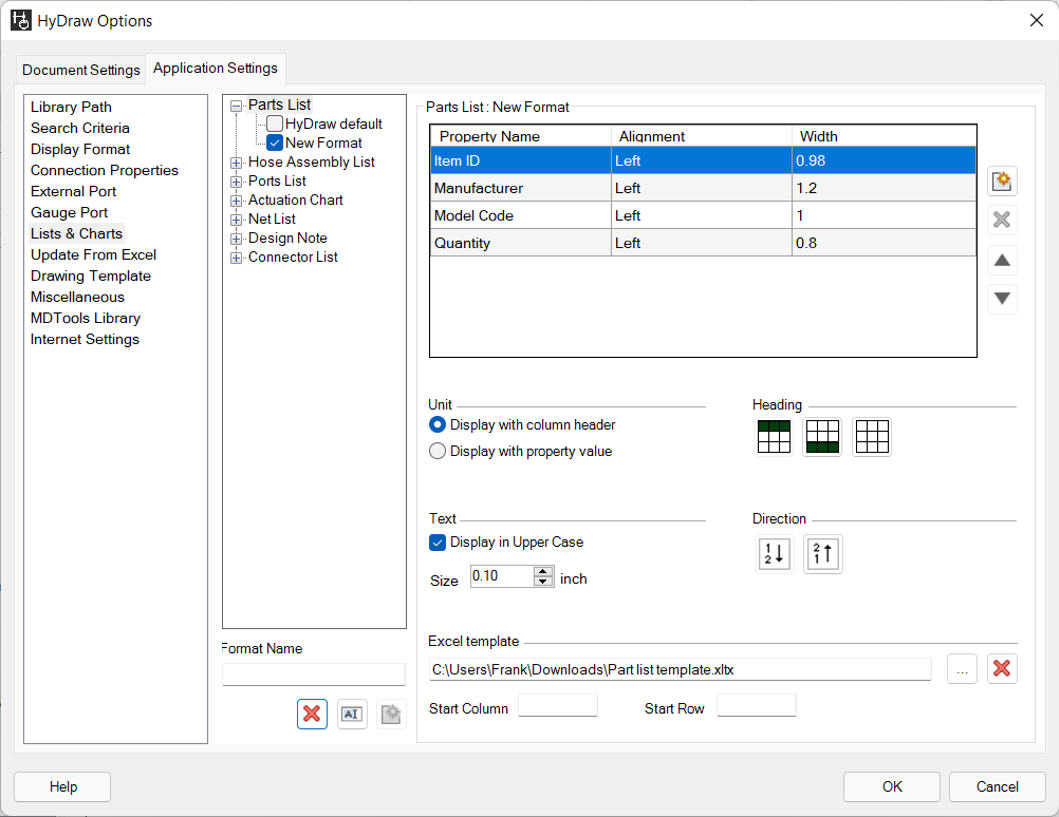
Customize the Parts List format
1. Click the Application Settings > Lists & Charts tab of HyDraw® options to select Parts list.
2. To rename a selected format, type the new name in the text box and then click  .
.
3. To add a new format, type the new name in the text box and then click  below the textbox.
4. To delete a selected format, click  below the textbox.
5. To move up, select the item and click  .
.
6. To move down, select the item and click  .
.
7. To delete a property, click .
You cannot delete property item ID.
8. To add Parts list columns, click .
The Select Parts List Columns dialog box displays.
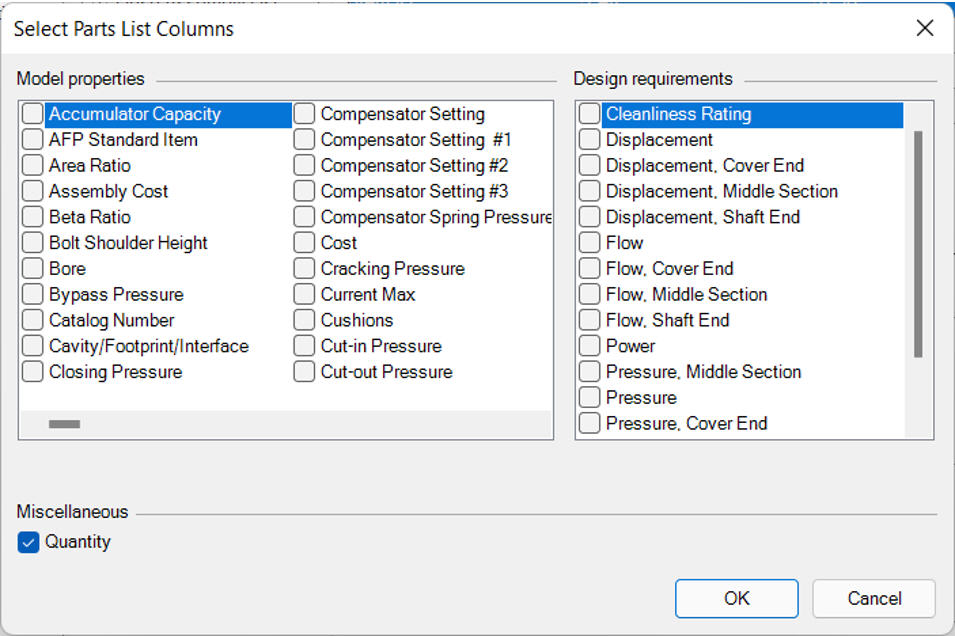
9. To include Quantity column, select the Quantity check box in the Miscellaneous section.
10. Select the required properties and click OK.
The selected properties are displayed in the Parts List tab page- Configure columns.
Unit: The Display with column header option shows the unit in the column header of the Parts list column.
The Display with property value option shows the unit with the property value of each row.
Text: The Display in Upper Case option shows the list in the upper case. Also, you can change the text size of the list.
Heading: The Heading drop-down option selects the list header direction. For example, top, bottom or none.
Direction: Sort the list in an ascending or descending order.
11. Select the Browse... button to export the Parts list in the Excel template format. Select the starting rows and columns of the given template.
12. Click OK.
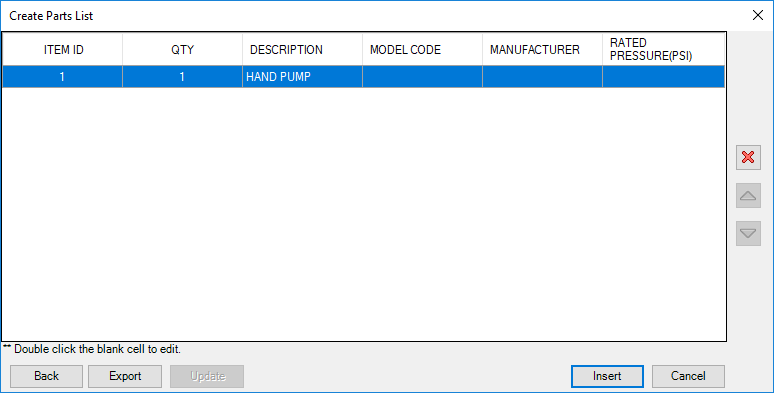
The selected properties are displayed in a tabular form when the Parts list is created in the drawing.