 on the HyDraw® CAD ribbon
menu.
on the HyDraw® CAD ribbon
menu.Insert the Solenoid Actuation chart in the drawing.
1. Click
Circuit >  on the HyDraw® CAD ribbon
menu.
The Select Symbols prompt displays.
2. Select a single or multiple symbol. After the completion of selection, press the Enter key.
The Use Item ID [Yes No] <Yes> prompt displays.
3. Press Enter.
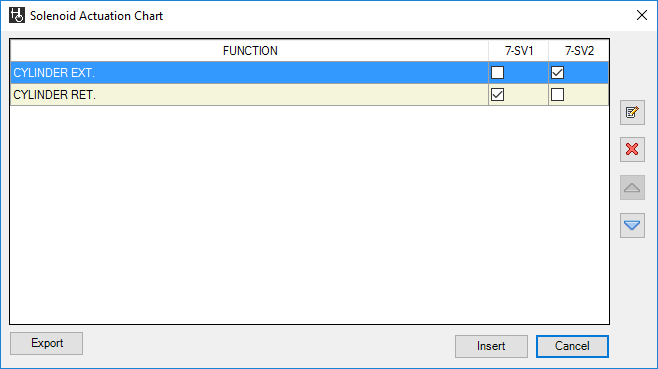
The Solenoid Actuation Chart displays Function, Item ID-Solenoid ID, if applicable.

Solenoid Actuation Chart – Grid View
4. Click
the Update  button
to update the function name.

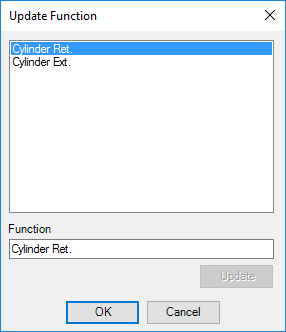
The Update Function dialog box displays.
• Select the function to update.
• Rename the function.
• Click Update.
• Click OK to display the changes in the Solenoid Actuation chart.
5. Click
 or
or
 to
move the selected item one row up or one row down, respectively.
6. Click
 to
delete the selected function from the list.
7. Click Export to Excel to save the Solenoid Actuation chart as an Excel file (.xls or .xlsx).
8. Click Insert to Drawing to insert the Solenoid Actuation chart into the drawing.
You can customize the Actuation List Format from HyDraw Option.

Note:
Solenoid IDs must be unique to create Solenoid Actuation Chart.